One of our most popular features is Custom Domain Mapping. This lets you use your own web address instead of the default networkname.mn.co when people visit your Mighty Network on the web. It also helps your search rankings and SEO.
👉 To use a custom domain, start a Free Trial or upgrade your Mighty Network to the Launch Plan or higher.
👉 On the Growth Plan or higher, you can also set up a Custom Email Domain.
If you run into issues with these steps, please contact support with your full subdomain from Step 1 and screenshots of your settings from Step 2.
Step 1: Buy Your Domain
Before you connect anything, you need to own a domain name.- A domain name is the web address people type in (like mycommunity.com).
- If you don’t already have one, you’ll need to purchase a domain from a provider of your choice. These are some popular options:
- GoDaddy
- Namecheap
- Google Domains
- Hover
- DNSimple
Step 2: Choose How You Want Members to Access Your Community
Now, decide what you want your members to type when they visit your Mighty Network on the web. This choice determines which record you’ll set up. 👉 Important: You only set up one or the other(A Record or CNAME) of the below options. If you want both, you need to first choose one. Then, follow instructions with your domain provider to set up a redirect that points to the other.- Members only need to type your root domain, like mycommunity.com.
- This is the simplest experience because no prefix is required.
- If someone types www.mycommunity.com, it will not work unless you add a redirect later.
- Members need to type your root domain with a prefix, like www.mycommunity.com or members.mycommunity.com.
- Only that specific subdomain will work.
- If someone types just mycommunity.com, it will not work unless you add a redirect later.
- Members can type either just your root domain (mycommunity.com) or your root domain with a prefix (www.mycommunity.com) and still reach your Network.
- To make this happen:
- Set up one option (root or subdomain).
- Add a redirect in your domain provider so the other version points to it.
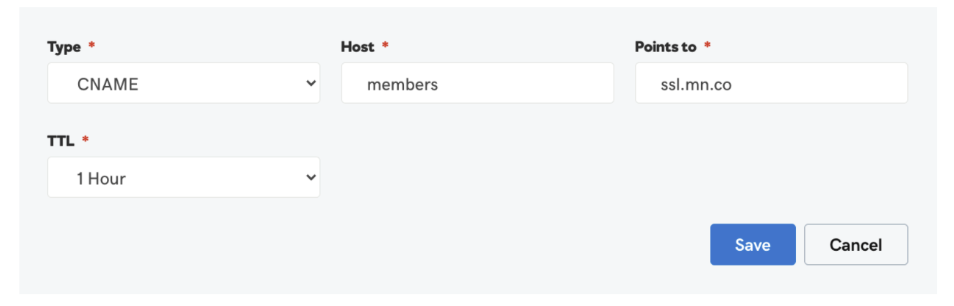
Step 3: Add Your Record with Your Domain Provider
The exact steps vary depending on your provider (i.e. GoDaddy, Namecheap, Hover, DNSimple, etc.). Here’s what you’ll enter:- Host/Name: @
- Points to/Target: Add two A Records, one for each IP:
- 147.185.161.77
- 147.185.161.78

- Host/Name: Just the prefix you chose (for example, www or members)
- Points to/Target: ssl.mn.co
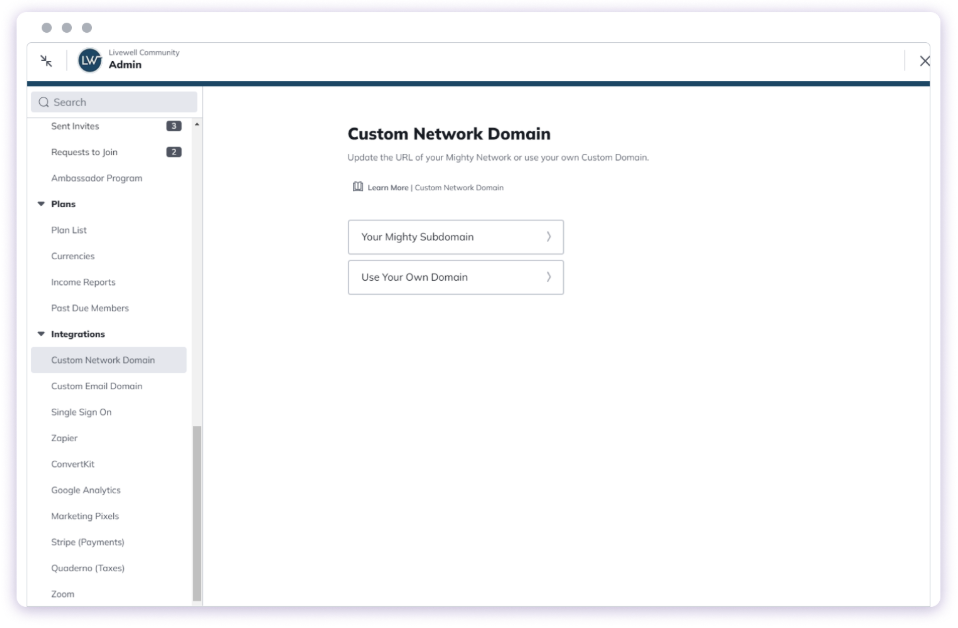
Step 4: Activate Your Domain in Mighty Networks
- Log into your Mighty Network.
- Go to Admin > Integrations > Custom Network Domain > Use Your Own Domain.
- Enter the domain you set up:
- If you used a CNAME (subdomain): type the full subdomain (e.g. members.mycommunity.com).
- If you used A Records (root domain): type only the root (e.g. mycommunity.com).
- Save and wait. DNS changes may take a few hours to update. The mapping will take some time to finish, but you don’t need to stay on the page. We’ll send you a notification once it’s complete.
- Once complete, return to the same page and click Activate Your Domain.
Step 5 (Optional): Set Up a Redirect
If you want both the root and subdomain versions of your domain to work — meaning that members can type either mycommunity.com or www.mycommunity.com (or another prefix you chose) and still be directed to your Mighty Network — you’ll need to set up a redirect with your domain provider. For example:- If you set up an A Record (mycommunity.com), you can redirect www.mycommunity.com so both work.
- If you set up a CNAME Record (www.mycommunity.com), you can redirect mycommunity.com so both work.
- Change the dropdown to https://
- Paste the custom domain you set up (A Record or CNAME)
- Choose Permanent 301 Redirect
- Select Forward Only